|
|
Date: |
August
18th, 2001 |
| Type: |
Review |
| Supplier: |
PCCaseGear |
| Author: |
mayhem |
Neon lights
are quickly becoming the rage in case modifications these days,
especially since alot of people are using Window Kits to make it
possible to see inside you PC (and even more dramatic modifications
of a completely clear perspex case). We have graciously been supplied
a new Dual 9" Neon kit from PCCaseGear.
Those of you
that have already seen or may even own a Neon for your PC then you
will definitely be interested in this product, its not like your
standard Neon, this one comes with two 9" long neons that will
nicely fit into just about any size case you have. The best thing
about having two neons is that you get a more even coverage with
the light, you can place each neon in a different area rather than
having light coming from a single source.
The Kit
Itself:
Well as said before this is Australian made, which means that not
only are you getting a great product but your keeping the sales
and profit in this great Country of ours, of course PCCaseGear do
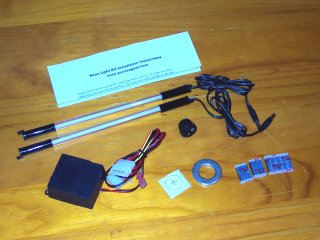
send international orders. The kit itself consists of the following:
- Twin 9"
ultra slim neon lights
- Remote inverter box that can be mounted anywhere in the case
- Pre-wired with 4-pin molex connecter and additional plug
- High quality rocker switch with drilling template and sticker
- Velcro mounting adhesive
- Available colours: blue, green, red or a mix of blue and green.
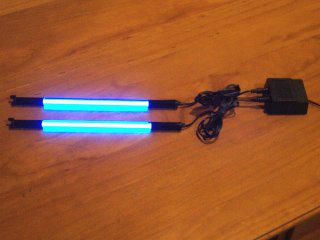
As you can
see from the above picture we couldn't wait to test these neons
out and had to see what they looked like the second they arrived,
amazingly bright even in the middle of the day, and at night they
light up my entire room in blue, rather impressive from the size
of the actual neon that produces this amount of light.
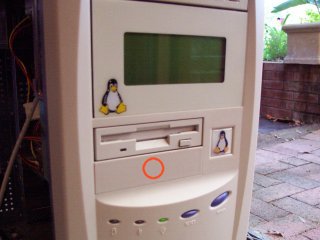
Installation:
The first thing you will need to do is remove the case from your
PC so that you can install the neon, of course we advise you turn
your machine off before connecting this as you want to make sure
you don't damage the light or even more so your computer. Once the
case is off put it carefully aside so that you don't scratch the
Window Kit.
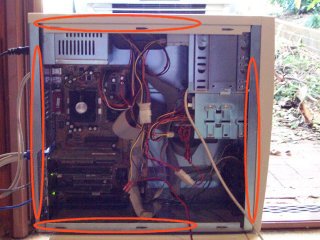
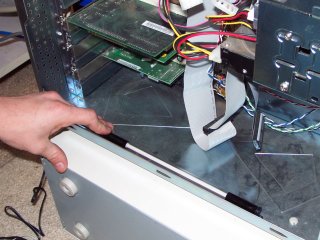
When it comes
to mounting the neon you have a number of choices of where you would
like to put it, mainly along the top of the case (if you have room),
the bottom of the case, the front and finally the back of the case.
Since this neon kit has two neons you want to place them so that
they can light all the inside of your case evenly, for this we decided
one on the back of the case and one of the bottom of the case as
these two positions would light up the entire window nicely. Now
that you have established where you want to put the neon careful
peel away the covering from the adhesive covers on the velcro, then
carefully place the neon in the desired location (keeping in mind
that you want the power cables out of the way and closest to the
power supply in your machine, but you can run them along the base
of the PC).
Next you will
need to make plug in the neons, since this is a full kit you are
supplied with some nice molex plugs that just need to be attached
to a spare lead coming from your PSU and then plug the two neons
into the power adapter unit that you just connected. Since the supplied
cable is double ended it allows you to place it in-line with another
device so that you don't loose the use of the plug (great little
feature for those who have a PC full of hardware), all you need
to is plug this lead in and its time to move on.
So the next
thing to do is work out where you want to put the switch to turn
the neon on and off (for those of you who want to do so), in our
case we didn't have any spare 5 1/4" bays to put the switch
and didn't want to drill a hole in the front of the case (saving
that for a Fan later), and we didn't want to drill a hole in the
side of the case (where most people do), so we just feed the wires
out the back of the computer as a temp place until I can decide
where to put it. To install the switch make sure you find a place
that does NOT have any obstructions behind it, you don't want to
make a hole in the side of your case and when you go to put it back
on have problems.
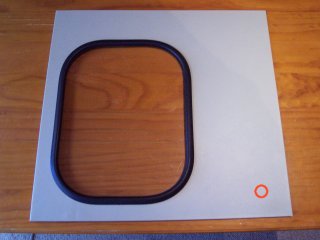
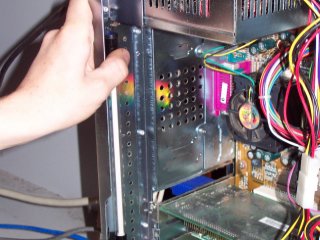
In order to
install the switch you will need to find the perfect location (just
a couple of suggestions are in the pictures above), then you will
need to place the washer in the location and mark the inside circle
with a pencil. Next you will need to tape up the area around the
outline so that the paint doesn't scratch or flake when you cut
the whole, you can simply use the supplied sticker with our without
additional masking tape. Using a drill, nibbler or dremel you will
need to cut along the outline as closely as possible. Once the whole
has been made clear away all tape and use a file to clean away the
rough edges and then push the switch into the hole.
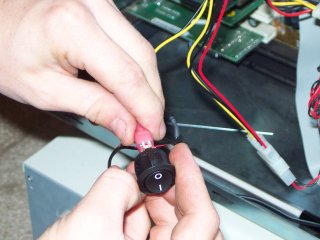
When you have
the switch in place you need to connect the two little plugs onto
the back of it, make sure that they are nice and tight as you don't
want them coming apart. Now that the plug is in place and all cables
are connected, get ready to fire this puppy up.
NEXT:
Testing and conclusion
|