|
The first thing
you will need to do is get some tools, they are not expensive and
definitely pay off in the long run:
CAT5 Cable-roll
(300m) - $100.00
Cable Plugs (RJ45) - $0.05 each
Crimping Tool - $40.00
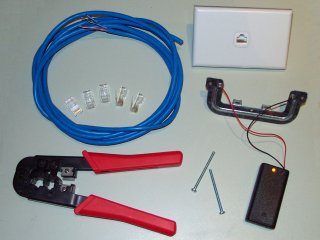
You may want
to take notice that CAT5 also comes in a variety of colours, so
if blue is not suitable for your application then you can get yellow/green/black
etc, also it comes in two different physical types, soft and hard.
Hard cable is mainly used from wall socket to wall socket (not covered
here), where as the soft cable is best for shorter cables that are
exposed (i.e. the ones you take to LAN's etc). Generally CAT5 cable
can't go more than 100m (hard) and about 30m (soft), without a repeater
(hub/switch) to boost the signal, and even then it can only handle
a small number of these.
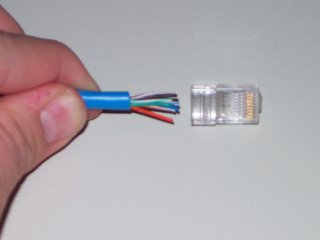
Now that you
have the equipment you need to work out what sort of cable you want,
what alot of people don't realize is that there are two man types,
cross-over and straight, and each are used for a different
application. Firstly the cross-over cable is what you would use
to connect two computers directly together, its called cross-over
because you must change the send and receive lines of the cable
so that one computer sends to the others receive (i.e so they can
communicated properly), the second is your typical cable that you
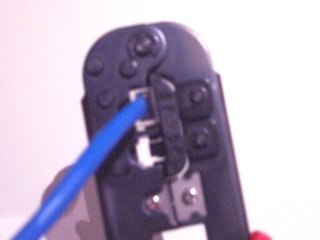
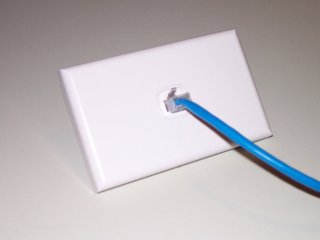
would use to connect computers to a Switch or Hub. (You will also
notice in the above photo on the right hand side the parts you will
need if you want to make a wall socket, these are available at any
Electrical Wholesaler, you can also see the custom cable tester
made from a batterie unit and a LED)
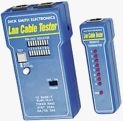
DickSmith Electronics
(www.dse.com.au) sell a rather
neat and handy cable tester, unfortunately its features are equaled
by its price, this will set you back around $100 (AUS), but if you
can afford it then go for it.
Features: "A
compact LAN cable tester that can easily check computer cable installations.
This unit comes with a RJ45 to RJ45 connector lead,RJ45 to BNC Socket
connector lead, RJ45 to BNC Plug connector lead and a BNC to BNC
adaptor. All packaged in a protective carry case.
- Verify
cable continuity, open, short and miswiring of 10 Base T, 10 Base
2 Ethernet cable, RJ45, RJ11 Modular cable, Cat 5 cable and 258A,
TIA-568A/568B Cable.
- Auto
or Manual scan for pin out indicators.
- Test
cable up to 1,000 feet.
- Ground
Wire Test."
Once you have
selected the type of cable you want to make, you can use the following
diagram to wire up the plugs. This is for a cross over cable, but
just use the top row on each end for a straight cable. The colour
coding used here is the IEEE standard, this is because the additional
4 wires are for ground and provide sheilding from interference (by
doing this you increase the maximum length of cable you can use),
you need to switch wires 1,3 and 2,6, this is when looking at the
bottom of the RJ45 8-pin plug (i.e with the clip facing down).
The two ends should
look like this:
| Standard
End |
 |
Crossover
End |
 |
|
Pin 1
White/Orange
|
Pin
1 White/Green |
|
Pin 2
Orange
|
Pin
2 Green |
|
Pin 3
White/Green
|
Pin
3 White/Orange |
| Pin
4 Blue |
Pin
4 Blue |
| Pin
5 White/Blue |
Pin
5 White/Blue |
| Pin
6 Green |
Pin
6 Orange |
| Pin
7 White/Brown |
Pin
7 White/Brown |
| Pin
8 Brown |
Pin
8 Brown |
| |
|
Cat5 wire
3D models from: http://www.netspec.com/helpdesk/wiredoc.html

Above image
courtesty of Greystorm: http://users.bigpond.net.au/storm/adsl/utp_more_myo.htm
The next thing
to do is measure off the length of cable you want to use, and allow
about 30cm extra for the ends and any problems you may have, alternatively
you might like to do one end then measure off and cut to ensure
that you aren't wasting any cable.
In order to
make the ends you will need to strip about 1.5 - 2.0 cm of insulation
(the blue cable covering) away so that the wired inside can be used.
Make sure that you don't cut into the wires as this can cause an
unwanted short when your using the cable, if you have cut into the
cable then just trim off the end and start again. Once the wires
are trimmed then you want to organize them like the block diagram
above (and the picture below) and insert them into the plug, with
the clip facing down, making sure they each go into the appropriate
whole in the plug and keep to the configuration pattern that you
selected. Generally you always do the straight end first.
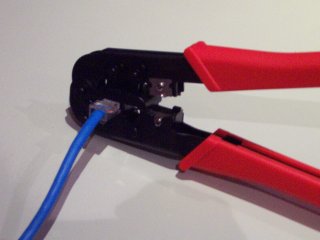
Since there
is excess wire you want to gently and slowly push the insulation
(blue outer cover) up towards the plug until it is past the little
notch in the plug (this is where it locks down on the cable). Before
you crimp the end you want to make sure that the wires are all reaching
the very tip of the plug, once you are sure then its time to put
the plug into the crimper and push really hard.
Its now time
to do the other end, basically following the same instructions,
but you may want to make it a crossover end, which means using the
bottom half of the diagram.
Its now about
5 minutes later (if that) and you have a nice neat custom network
cable, pretty easy, now its time to test. Plug one end into your
computer and the other end into the other computer of Switch/Hub.
You should notice that apon plugging the cable into the second machine/device
that the lights on the network card/port should turn on, this means
that there is a connection (first checkpoint down), the next test
is to see if the computers can talk to each other and send/receive
data across your new line. If all has gone to plan than you should
be done, time to make some more.
Now that you
know how to make your own cables and you have the tools and a roll
of cable you will be able to make them on demand, if you go to a
LAN and someone is missing a cable then you can make one for them,
if you need to wire your home up, then your set.
From doing
this you have probably also learned that you can tell what type
of cable you have by comparing the ends, if the colouring is the
same on both ends you have a straight cable, if they are different
then you most likely have a cross over cable.
|


