|
|
Date: |
June
18th, 2001 |
| Type: |
Review |
| Supplier: |
Avocent
|
| Author: |
mayhem |
Are you getting
sick of having to swap monitors and maybe even keyboard and mouse
over to your server when you want to do something at the console,
its rather annoying isn't it? Well there is no need to do this anymore,
even if you don't have a spare monitor there is still a way, the
Keyboard-Video-Mouse Switch (KVM) is the solution. Below is the
setup that I had before using the KVM, what a mess, I kept getting
the keyboards mixed up, this is probably a sight that most of you
are getting used to, or even some people who only use a single set
and must keep swapping them all over.
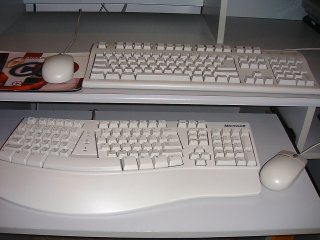
One of the
leading KVM products on the market is the Cybex SwitchView, (Some
of you may have already heard of it as the Avocent SwitchView, well
this product is one and the same, "In July 2000, Cybex and
Apex merged to form Avocent Corporation"). These products
come in a range of models (2-port, 4-port etc) has a list of great
features:
PC
selection from the push of a button.
Scan mode
to run through each PC in sequence
Hot plug
capability allowing PCs to be added or removed without powering
down the switch or attached servers
Small footprint
to make it ideal for single user multiple workstations/servers.
Colour coded
cables and plugs for easy installation
No external
power supply required
Supports any
operating system you may run
Supports PC/AT
and PS/2 keyboards
Initial
Package
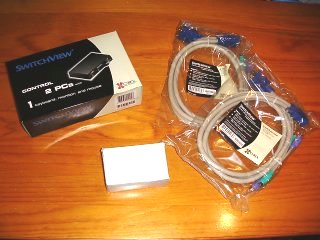
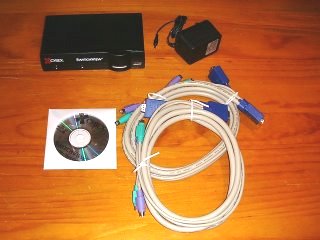
This product
has alot of functionality in one compact unit, it has basically
the same physical size as a standard 5-port network switch/hub.
It looks very neat and professional and its simple design doesn't
make it standout.
Setting
It Up
The first thing you will need to do is unplug any keyboard, video
or mouse cables from the back of your systems in order to make
way for the SwitchView cables. It is probably advisable to power
down both machines if you can, just makes the process easier and
prevents problems, but as stated above the SwitchView supports
hot swapping.
Since the
cables that come with the kit are colour-coded it makes for a
painless installation, plug the first set of cables into your
main machine and then plug it into the A port plugs on the back
of the KVM (I made this my server machine), then with the second
set of cables you want to plug these into your other machine and
then into port B on the back of the KVM (this was my client machine),
of course if you have the 4 port version then you will follow
the same for C and D ports. The last thing you will need to do
is plug your peripherals into the KVM, these are the plugs on
the very left hand side marked USER. If you want to make the cabling
nice and neat then you can cable tie the sets of cables together,
i.e. keyboard/video/mouse of each set into a bunch.
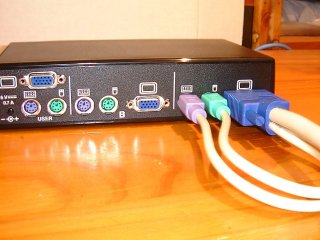
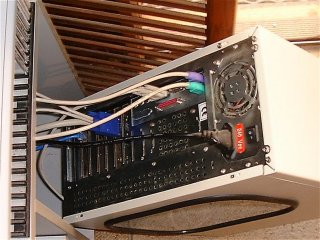
The above
is the setup with the server plugged in. All up it is a pretty
straight forward and easy installation, once you have completed
your setup you should have something looking like the below image,
now you just need to place the SwitchView somewhere on your desk
where its not in the way and is easily accessible should you need
to swap computers quickly.
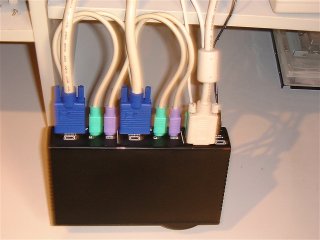
As you can
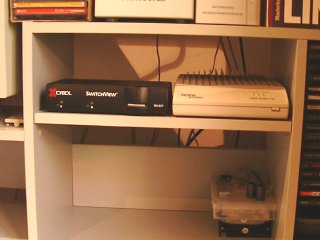
see below, it fits in nicely next to my cable modem, the SwitchView
itself is rather light, and as such the cable tend to make it
tip up a little, but with some fiddling it was made to site nicely,
and with some luck it was the exact size for the space that was
next to my modem, what pot luck.
The cables
that came with this kit made the install even quicker and also
helps to keep the area tidy, as you can notice the cable for each
computer has the Keyboard, Monitor and Mouse built into one cable,
the end with the shorter ends is for the plugs on the back of
the KVM and the longer ones are for the PC, the long ends are
fairly lengthy so that they will fit any computer be it mini or
full tower.
NEXT:
Testing and conclusion
|

