|
|
Date: |
February
9th, 2003 |
| Type: |
Review |
| Supplier: |
PCCaseGear |
| Author: |
mayhem |
| RRP: |
$8.80
(AUS inc GST) |
These days there
are so many people modifying their cases and installing window kits, it
has got to the stage where if you want your case to be different then
you need to do more than just install a window and some coloured neon's.
This is where an Etched Window Applique can help to improve the looks
and overall appearance of your window. Here we are reviewing one such
mod available from PCCaseGear, the Tux Etched Window Applique.
The Applique
These appliques
are designed to be applied to the back of the window and are easily removable.
Approximately 7.5 inches in diameter. The penguin finally makes it into
our range! Full credit goes to Larry Ewing and The GIMP.
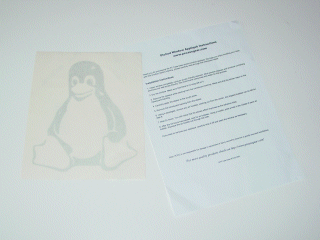
This Tux applique
is based on the Linux Penguin (hence the reason this one was supplied
for our review, what better to put it on than a Linuxbox server) and is
one of many that PCCG have in their range.
Installation
Since the applique
is only a sticker, it is quite straight forward to apply, you just need
to be careful in order to prevent it from bubbling.
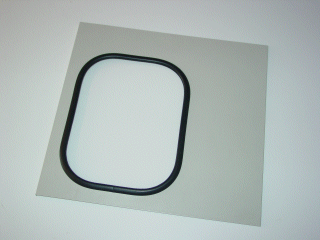
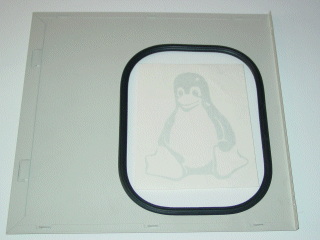
The above picture
is of the window before the applique was applied.
For those people
that are lazy or just want to follow instructions then your in luck, the
applique comes with a straight forward 8 step instruction sheet for how
to apply it. Here are the steps we followed:
- Clean window
completely using an acrylic-friendly cleaner.
- Dry the window.
Make sure that there is no cleaning liquid left on it.
- Remove the opaque
white backing from the translucent backing. Make sure that the sticker
stays on the translucent backing.
- Carefully apply
the sticker to the acrylic pane.
- Remove the translucent
backing from the sticker.
- Using a squeegee,
remove any air bubbles, working out from the center. Any trapped bubbles
can be left for step 8.
- Wait 24 hours.
You will notice that the etched effect improves as the adhesive dries.
- After the 24
hours has passed, look for air bubbles. Using a needle, poke a hole
in the middle of each air bubble. Squeeze the air bubble out through
the hole.
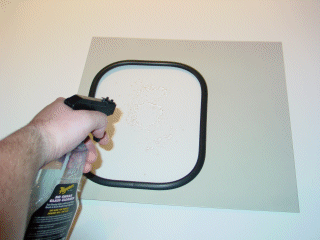
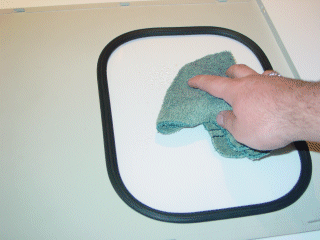
The above pictures
are of the window being cleaned, a clean household cloth was used with
some Meguiar's "No Smear Glass Cleaner" (this was used as it
is good quality glass cleaner, and it doesn't contain any ammonia so is
safe for use on perspex and acrylic). Below are the applique being applied
to the window itself.
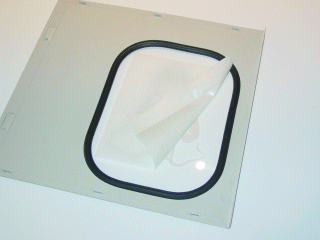
The whole process
takes less than 5 minutes to do, this makes it one of the quickest mods
you can do (not to mention one of the cheapest).
Result
The following images
speak for themselves, the applique makes the window more interesting while
still allowing you to see inside the computer (isn't that the reason you
put the window kit in?).
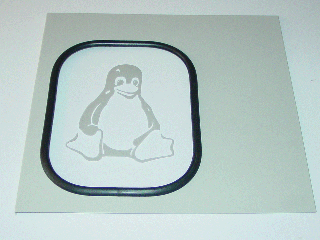
The above picture
is straight after applique has been applied to the window, the below are
with the side panel back on the computer with the neon on and off to give
you an idea of what it will look like:

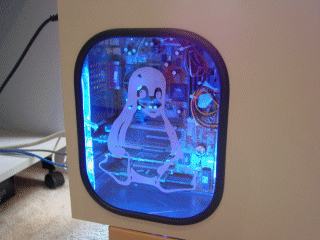
The neon gives the
applique a more defined appearance and is definitely when I think the
applique is most effective. As you can see from the above images the overall
effect of the applique is to make it look like a laser etched image in
the perspex window, but in reality of course its simply a silver metal
looking sticker which is removable, meaning if you later change your mind
then you don't have to get another piece of perspex to replace your window.
Conclusion
Overall this is a
nice simple mod that can be done with a minimum of fuss and expense.
Pros:
- Easy Installation
- Price
- Makes a more effective
window mod
- Applique is applied
to inside of window (makes it harder to damage it)
Cons:
- No squeegee supplied
(would be good for those that don't already have one)
Special thanks to
James Cameron of PCCaseGear for
supplying this Tux Etched Window Applique.
If you would like
an Applique to complement your window kit, then visit the PCCaseGear website
at http://www.pccasegear.com/
and make your order online, also they stock a wide range of cooling and
lighting equipment to even further improve the look of your machine.
Score:
9.5 / 10
FORUM: Talk
about this and other mods
|

