|
|
|
|
Date: |
October
6th, 2001 |
| Type: |
Review |
| Supplier: |
APC
|
| Author: |
mayhem |
| RRP: |
$221
AUS ($315 AUS for Back-UPS CS 500 model) |
|
In the fastly
growing Information Technology (IT) Industry there becoming a more
evident risk to businesses and even home users, everyone is trying
to sure that systems are always working, part of this is protecting
your system from malicious hackers, and also comes around to ensuring
your systems keep the best possible uptime they can possibly by
providing an alternative power source when black outs strike, this
is where APC have made there mark in the industry. APC is a world
leader in providing UPS solutions, but they also provide a large
selection of other products.
The Backup-UPS
CS 350VA is one of the latest in APC's line of UPS solutions, for
those of you who are unsure a UPS is a Un-Interruptable Power Supply
unit that will provide power to system
| Product
Overview |
| Description
|
APC Back-UPS, 350VA/210W, Input 230V/ Output 230V, Interface
Port USB |
| General
Features |
Addl
Surge Protected Outlets , Audible Alarms , Auto Diagnostic Testing
, Hot Swap Batteries , Internet FAX - modem - DSL protection
, Lightning and Surge Protection , Modem Protection , Software
, Status Indicator LED's , Unattended Shutdown , User Replaceable
batteries , USB compatible |
| Includes
|
CD
with software , User Manual , USB cable |
| Documentation
|
User
Manual (download English version direct here) |
| Technical
Specifications |
| Output |
|
| Output
power capacity |
350 VA |
| Output
power capacity |
210
Watts |
| Nominal
output voltage |
230
V |
| Waveform
type |
Stepped
approximation to a sinewave |
| Output
Connections |
(3)IEC
320 C13 (1)IEC 320 C13 (Surge) (2)IEC Jumpers |
| Input |
|
| Nominal
input voltage |
230
V |
| Input
frequency |
50/60
Hz +/- 5 Hz (manual switch) |
| Input
Connection Type |
IEC-320-C14
inlet |
| Input
voltage range for main operations |
196
- 280 V |
| Batteries |
|
| Typical
backup time at half load |
22.2
minutes |
| Battery
type |
Maintenance-free
sealed Lead-Acid battery with suspended electrolyte : leakproof
|
| Typical
recharge time ** |
6
hour(s) |
| Replacement
battery cartridge |
(1)
RBC2 |
For full product
specifications then please visit the APC information page for the
Back-UPS
CS 350.


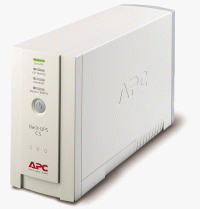
The unit itself
is is only 9cm x 16cm x 28 cm (height x width x depth - approximate
size) which is rather nice and small and you can put it just about
anywhere around your machine. Along with the battery backup the
unit also allows for surge protection for your computer including
RJ11 Modem/Fax/DSL (two wire single line) protection.
Along with
the functionality the unit has a nice stylish design, the beige
colour fits in with most computers and desks and the curvy case
make it appealing to look at.
Setting
Up The Unit
Firstly you will need to un-pack all the parts of the product that
you got in your delivery, you should have:

1 x UPS
2 x Power Cable (UPS to device)
1 x USB Cable
1 x Software CD
1 x Telephone line
The unit comes
with the USB cable, but if you fill out the form that comes with
the UPS and send it to APC they will send you a CD and a Serial
Port cable that you can use on an older machine or under Linux.

When firstly
setting the unit it will need about 6 hours of charging before it
can be fully functional, basically you will need to plug it into
a decent power source and then plug your computer (client or server
machine - we used our client machine here). Below you can see how
small the unit is in comparison to a section of a ATX Full Tower
case (you could fit almost eight of these into the case).


Installing
The Software
Although the software that comes with the unit only supports Win32
(i.e. Win9x/Me/2k) and Mac machines you can still use the UPS for
a Linux machine, what you will need to do is send away for the above
mentioned Serial cable and download the software (PowerChute Plus)
for your specific distribution. You will find all the software for
APC products available on their download
page. Alternatively choose your distro: Red
Hat 6.x, Red
Hat 7.1, Caldera
2.3, SuSe
7.0 and TurboLinux
6.0.
Windows
(Win2k):
When you put
the CD into your drive it should autorun the Installation Wizard
which will simply install the appropriate power settings onto your
computer. As well as the installation software you will also find
a User Manual for the product.
Additionally
you can install the second CD if you requested the Serial cable,
this is also rather straight forward and similar to the previous.
It should autorun the Installation Wizard when you put the CD into
your drive, just select your Operating System and then PowerChute
Plus. When the installation is complete all you need to do is select
the model of UPS that you have and the com port that it is connected
through, then you can select whether or not you want to use Remote
Monitoring (it is recommended that you use this feature).
Linux (Red
Hat 6.x):
You can download PowerChute Plus in either a tarball or rpm format.
The best way to install the program is by using the rpm, this can
be installed by typing rpm
-ivh PowerChutePlus-4.5.2.1-1.i386.rpm, once this is done
it will ask you to run /usr/lib/powerchute/Config.sh,
this will then prompt your for the following information.
- What UPS
model you have.
- If you have
TCP/IP installed.
- The colour
scheme you want to use.
- The serial
port that you wish to use for the UPS.
- Do you want
to execute commands with root privileges.
- Do you want
to send e-mail as root.
- Confirm
the above information. (It will then check it can communicate
with the UPS).
- The password
you want to use for the pwrchute
user it creates.
A good idea
for the communications port is to make a symbolic link, e.g. ln
-s /dev/ttyS1 /dev/ups, this makes it alot easier to use.
It may also be necessary for you to make adjustments to your configuration
so that the software can correctly communicate with the UPS.
Tarball Download:
ftp://ftp.apcftp.com/software/unix/linux/pcplus/4521/pc4521_glibc.tar
RPM Download: ftp://ftp.apcftp.com/software/unix/linux/pcplus/4521/PowerChutePlus-4.5.2.1-1.i386.rpm
Installation Guide: ftp://ftp.apcftp.com/software/unix/linux/pcplus/4521/install.txt
User Manual: ftp://ftp.apcftp.com/software/unix/linux/pcplus/4521/pclinxug.pdf
Setting
Up the UPS
Now that you have the software installed shutdown your computer,
when its all powered off you want to connect the power lead to the
UPS and then connect the leads to the back of your Machine, you
will notice that the unit has quite a number of power connections
available but you must remember that it has a power rating of 210
Watt Output so you don't want to connect too many things to it (for
this review a Pentium II 450 system running Win2k and a 17"
monitor was connected to the UPS), luckily the UPS has an "Overload"
light, this is will light up to tell you that you are running too
many devices through the unit.

When all the
cable are connected (everything except the USB cable) then turn
on the UPS with the button on the front of the unit, it will make
some clicking noises (don't worry this is the machine turning on).
When this is done you can power up your machine, if all has gone
well then you should only have the top "On Line" light
on the UPS.
Once your machine
is fully running then plug the USB cable (note this is optional
and you don't have to use it, especially if you are using Linux
as there is no supporting software), with any luck your machine
should successfully detect the UPS and install the correct drivers
for it.

You should
also notice this icon,  ,
in your taskbar, this is the "Power Options" for your
computer, if you double click on the icon is will bring up something
like the following screen: ,
in your taskbar, this is the "Power Options" for your
computer, if you double click on the icon is will bring up something
like the following screen:

This information
tells you that the machine is running on the newly setup APC USB
UPS scheme which will be using the listed settings, this is how
the machine will shutdown (standby / hibernate) when the UPS battery
runs low.

This next tab
shows when the machine will alert you of a Low Battery and also
Critical Battery power.

The following
tab tells you how much power the battery in the UPS has, as usual
100% means that the battery is full, as you can see above the unit
is charging itself.
Basically you
have finished setting up the UPS and your system is pretty safe
from short power outages, you can change the setting if you want
to adjust the times at which the unit will warn you, shutdown etc.,
we recommend that you don't change the settings to far from what
they are as your system might not shutdown in time, the best way
to adjust these settings is to test the unit (see next section)
to see how long it runs on the load that you have placed on it.
On top of the
three battery backup plugs there is an additional fourth plug that
provides surge protection only, this is good for a device that you
want to protect in case of a power spike but don't really need if
the power goes out.

NEXT:
Testing and conclusion
|