|
|
Date: |
April
19th, 2001 |
| Type: |
Review |
| Supplier: |
PCCaseGear |
| Author: |
mayhem |
Installing
The Window:
Once your happy with the case it is time to remove the masking tape
and get ready to put the acrylic window in. Firstly it is recommended
that you clear everything away (this includes sharp tools and loose
fillings of metal, as these can scratch the acrylic window) and
that you clean the case down so that there is nothing loose on it.
Place some
towel or newspaper down on a flat surface and place the panel with
the outside (painted side) facing down. Now you need to install
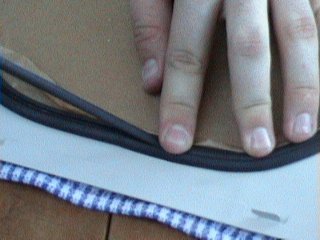
the rubber molding all around the newly cut whole, (make sure that
the side with the groove for the locking strip is facing you - the
inside surface of the case) I recommend that you don't cut the molding
until the very end when you have made sure its as firmly held in
place as possible (we didn't need to trip the molding at all - but
we did trim the molding strip as it was a bit too long), its better
to squash it in as best you can as it will eventually shrink with
time and heat (impossible to stop with rubber).

Peel the cover
edges off the acrylic window (about 2-3cm) so that you can fit the
window into place (and still protect it). This is about the only
fiddly bit of the installation, you will need to carefully place
one corner of the window into the rubber molding and keeping adjusting
it until you can completely install the window into its place. It
is alot easier if you roll the molding over the lip and then put
the window section in and then carefully roll the molding back into
place (this is where it pays to have a friend help you, two people
can put it in a whole lot easier than a single person can). With
the aid of a small jewelers screwdriver or a small one of any kind
it makes the install a fair bit easier as you can hold the rubber
up while carefully installing the acrylic.
The rubber
seems to be a little too thick, i.e. It sticks out a fair bit, but
I am assuming this is to hold it firmly in place and also prevent
the acrylic from being scratched if the case rubs up against something.

Once you have
the window firmly in place it is time to insert the locking strip
to hold the window in place. If you carefully look at it you can
notice that one end is slightly wider than the other, this is the
side that faces up to make a nice tight fit and spread the molding
to make it as tight as possible. It is recommended that when you
start to put the locking strip in place that you don't start near
the ends of the molding, as you want to make the seem as small as
possible so that its hard to see and looks like one whole piece.
Make sure that you press the locking strip in as firmly as you can
so that it holds nicely, and when done you may need to cut any excess
off from the end with the utility knife.

Now that you
have the acrylic window installed nicely, it is time to remove the
paper covering from the perspex, but be very careful and pull gently
as you don't want to pull out the window and have to put it all
back in again. Now you should have a lovely clear window in the
side of you case. Since the acrylic is new and has had its covers
removed it has a slight static charge and therefor will attract
alot of dust etc. so you might want to wash it down. (It is going
to get dusty so you will need to regularly wash it down to keep
it clear and looking good)

Conclusion:
Well the whole process took took less than one hour to do, and as
you can see from the final photo below it looks great. The instructions
provided were really clear and simple to follow and there wasn't
any major drama's during the installation process. Its just a pity
that for now my machine has to be located in a sort of corner (will
have to move it shortly so as to make full advantage of the window).
Thanks to the use of the jigsaw it was a quick cut and very close
to the perfect shape of the window.

I give the guys and
girls at pcMods and especially PCCaseGear
a big round of applause this mod, its simple to install and very effective,
all it needs now is a nice Lightning Neon Light (HINT HINT) to
make it look even better (maybe in a later review), its also an inexpensive
way to make your case a feature and not an eyesore (I am now considering
putting one in my full tower case). A special thanks goes out to James
Cameron from PCCG who organised and supplied the Rectangle window kit
for review.
If you like the look
of this window as much as I do and wish to purchase a kit for you own
machine, then please visit the PCCaseGear website at http://www.pccasegear.com/
and make your order online, also they stock a wide range of cooling and
lighting equipment to even further improve the look of your machine.
Score:
9 / 10
FORUM: Talk
about this and other mods
|

